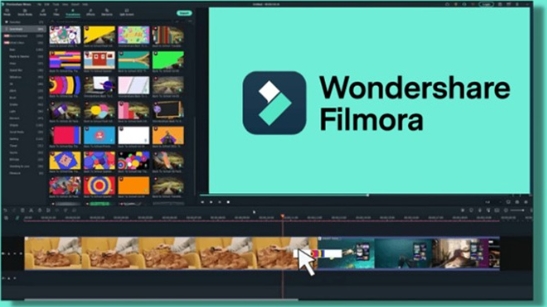
Hey there, video creators and curious editors! Welcome to this in-depth filmora tutorial, where we'll break down the essential features of Wondershare Filmora and walk you through practical editing workflows. I’ve tested a bunch of editors, and Filmora really strikes a sweet spot—melding an intuitive interface with powerful tools that scale from beginner to intermediate levels. In this tutorial, I'll walk you through the full suite: from installing the software to mastering cutting, transitions, visual effects, green screen tricks, audio enhancements, and smooth exporting. So whether you're crafting your first YouTube video or refining your fifth vlog, this guide has your back. Let’s dive in!

I. Introduction and Overview
A. App Introduction
Filmora by Wondershare, available on both Windows and macOS, is built for creators who want power and simplicity. Its timeline-based design and thoughtfully grouped tools make editing approachable, while its regularly updated effects library keeps things fresh and creative.
B. Tutorial Objectives
In this guide, we'll:
Build editing skills from basic cuts to polished effects.
Shed light on Filmora’s best features—like transitions, keyboard shortcuts, audio mixing—to help your videos stand out.
II. Installation and Setup
A. System Requirements
To get the best out of Filmora, especially for fast previews and rendering, your system should meet:
Windows 10/11 or macOS 10.14+
At least 8 GB of RAM
A modern Intel i5—or equivalent
A dedicated GPU recommended
These specs ensure a smooth editing experience and efficient 4K handling .
B. Installation Steps
Head to the official Wondershare website and grab the installer.
Run it—default settings are fine.
Once installed, launch Filmora and activate your license via login or activation code (Help menu has you covered).
III. Basic Editing Tools
A. Clip Management
Import media via drag‑and‑drop or the Import button.
Use the razor tool (Ctrl + B) to split clips.
Trim handles let you shorten clips precisely.
Drag clips to reorder or merge them.
Detach audio by right‑clicking—a quick way to separate visual and audio layers .
B. Timeline Navigation
Zoom with Ctrl + mouse wheel for frame-level precision.
Lock tracks to prevent accidental edits.
Use ripple delete to close gaps efficiently.
IV. Transitions and Effects
A. Applying Transitions
Visit the Transitions tab, drag your preferred effect (e.g., dissolve, wipe, slide) between clips.
Fine‑tune duration by dragging handles directly on the timeline.
B. Visual Effects & Filters
Dive into Effects > Filters to explore cinematic LUTs, glitch looks, blur, vignettes, and more.
Click an effect in the inspector to adjust parameters like intensity and blend mode.
V. Advanced Editing Techniques
A. Green Screen (Chroma Key)
Add your background clip to track 1 and the green-screen clip above.
From the Effects > Utility, drag the “Chroma Key” onto your green-screen clip.
Use the key tool to pick the green and tweak tolerance and edge feathering for a clean cut .
B. Keyframe Animation
Click a clip, open the Effects Controls panel.
Add keyframes to properties like scale, position, opacity.
Animate smooth zooms, pans, or fades by setting start and end points.
VI. Text, Titles, and Graphics
A. Title Presets
Open the Titles panel: choose from static titles, lower thirds, animations.
Edit your text, fonts, and colors. Then tweak animations via inspector controls.
B. Graphic Overlays
Drag PNG logos or badges onto higher video tracks.
Adjust opacity and apply blend modes (Overlay, Screen, etc.) for a seamless look.
VII. Audio Enhancement
A. Music and Sound Effects
Import your audio files or pick from Filmora’s royalty‑free library.
Drag to audio tracks, positioning as needed.
Use fade handles at clip ends for smooth transitions.
Try beat-synchronization tools to match cuts with music rhythms .
B. Voiceover and Noise Reduction
Record voice directly via the mic button.
Open the audio mixer to adjust levels.
Apply Audio Denoise and Equalizer to improve clarity.
VIII. Color Correction and Grading
A. Basic Adjustments
Enter the Color tab to tweak brightness, contrast, saturation, white balance.
One-click Auto Enhance offers balanced adjustments based on scene analysis.
B. Advanced Grading
Work with three-way color wheels for shadows, midtones, highlights.
Save custom LUTs to maintain a visual theme across multiple videos.
IX. Export and Sharing
A. Export Settings
Hit “Export,” choose output format (MP4, MOV, or GIF) and resolution (720p up to 4K).
Adjust frame rate and bitrate to balance file size and quality.
B. Direct Upload
Filmora supports direct uploads to YouTube and Vimeo—just connect your account.
Social media ready! Share seamless uploads without leaving the app.
X. Tips, Shortcuts, and Best Practices
A. Keyboard Shortcuts
Ctrl + B – split clip
Ctrl + Z – undo
J/K/L – navigate playback
Customize hotkeys under Preferences for personalized workflow.
B. Project Management
Name projects with version numbers (e.g., “Project_v1, _v2”) and enable auto-save every 5 minutes.
Use bins or folders to organize media, especially helpful for large or multi-scene projects.
XI. What’s New in Filmora 14 (2025)
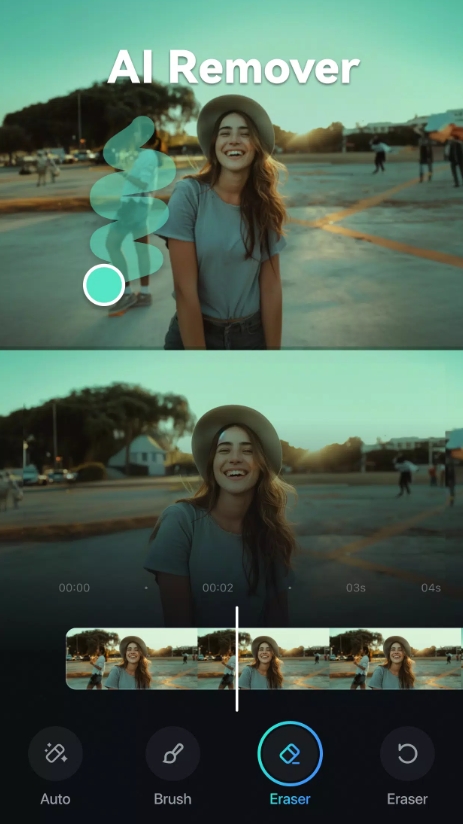
Filmora’s latest version builds on its toolbox with smart AI-powered tools :
Smart Short Clips – AI identifies key moments and auto-cuts.
AI Video and Voice Enhancer – refine clarity.
AI Audio and Caption Tools – generate subtitles and custom sound effects.
Auto Reframe – instantly resize for platforms like TikTok or Shorts.
Text-to-Video and Avatar Presentation – create dynamic visuals from scripts and avatars .
RTX HDR support – accelerate HDR conversion on Nvidia hardware .
XII. Pros and Cons
Pros
Accessible layout ideal for beginners transitioning to intermediate editing.
Packed with powerful features: green screen, motion tracking, beat-sync.
Affordable and regularly updated, meaning growing value.
Strong asset library and AI tools save time and boost creativity.
Cons
Free version adds a watermark to exports.
Asset packs (Filmstock) may incur extra costs.
Manual controls aren’t as deep as Premiere or DaVinci Resolve.
Heavy AI use can eat into monthly credit pools .
By the end of this filmora tutorial, you should feel confident navigating Filmora’s full feature set. It delivers a seamless editing experience from the first clip import to dynamic exports. If you're creating content for YouTube, Instagram, or personal storytelling—and want speed, flair, and some headroom to grow—Filmora is a fantastic choice.
It’s not a professional-level beast, but it’s powerful and approachable. Its strength lies in its balanced blend of ease-of-use and creative muscle—plus its evolving AI toolkit keeps it ahead of the curve.
So, install Filmora, try these steps, test out the AI tools, and let your creativity roll. I’m here to create deeper guides or tackle any techniques you’re curious about—just say the word!


